Welcome to part 2 of my small venue survival guide, or all the little things I wish someone had told me when I set out on this journey. The tips in this guide should hopefully help you own the small venue gig, rather than the small venue gig owning you.
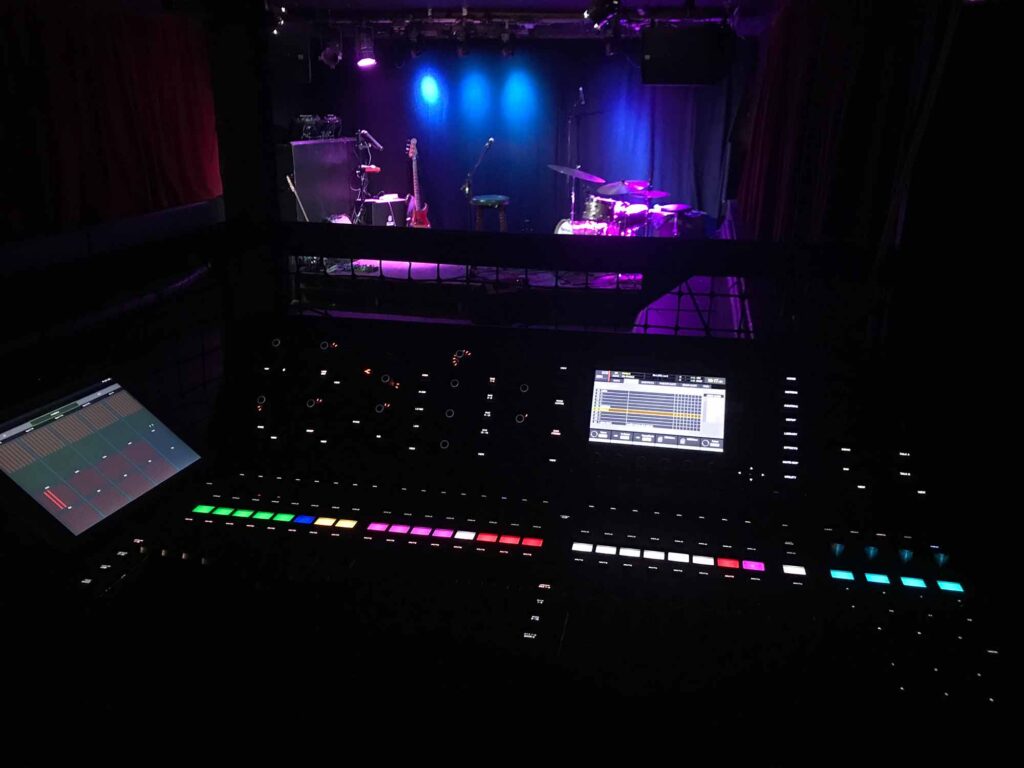
If you have followed the steps described in part 1 of this guide, then you should by now have a desk and sound system that kind of works, or at least you have figured out what works and what doesn’t and have prepared your solutions around this. You have set up a number of mics and have sorted out feedback. There are some basic effects dialled into your desk and you have a decent idea about what number of musicians to expect on stage, what sort of music they’ll play and with what kind of instruments. Now the bands have arrived and it’s time to sound check.
First, introduce yourself: “Hello I’m Soandso and I’m doing your sound tonight”. It makes everything a bit less impersonal and helps everyone understand that yes, you are the sound engineer, not wardrobe or the bar person or something. Get the performers names and write them down somewhere, that’s a nice touch.
At this point I take a moment to go over the tech specs with the band. Again. Because the riders will be wrong. Also, if you are in a slightly bigger venue and have bands with touring engineers, they often seem to be in a hurry at this point. I try to avoid that and like to take the time to go over things – properly. How then do you do that? My trick is…..coffee. Or tea. It really helps to keep the people in one place. Make a cup of something hot and offer it to whoever wants one and especially whoever you need to talk to. Then, take out your input list that you’ve printed out in part 1, lay it out and go over it point by point and channel by channel. Taking the time to go over this properly somehow helps to set a good pace for the rest of the night compared to rushing through things.
That time you checked how many channels you have on your desk that actually work, and where the bad ones are where you can’t fit your active DIs? Now is when this comes in really handy. The band shows up with a 48-channel count but you only have 18 and a half that are usable? Time to discuss whether that snare really needs two mics, or that keyboard really two DIs etc. Go over it and make sure it all fits and point out what should be adapted. Once established, keep your updated input list on you all the time. Take a photo of it (you’ll immediately lose it somewhere). And have some spare ones.
So now your final number of inputs and sends is decided on, you’ve squeezed what you get into whatever working equipment you have available and any issues are ironed out. You now proceed to mic’ing up all of the instruments.
If you’ve come prepared as per Small Venue Guide 1, you already have some mics out, with their stands and working cables at the ready so it will be a matter of adding to removing some. Sometimes in a very small venue mic’ing up will be just kick, vocals, and whatever is electronic. Figure out what approach your venue size calls for and what the sound system can deliver. If you’ve got limited power, put the least stuff in it and try to work with backline while keeping band levels down. The biggest issues will always be making sure the vocals cut through. The more power you have, and the larger the place, the more you’ll be able put through the speakers. Label any cable that may be unplugged and swapped around for something else at any point in the evening. It saves you a lot of headaches.
In small venues with no clear headliner, I sometimes sound check in order of appearance. Especially if the bands share backline. Make do with whatever band members are there and just check more instruments as people arrive. I was able to often get away with sound checking only one band. Also, in that case, and if bands are similar, I find it counterproductive to create a new scene for each band, as often the mix gets better during the first gig and I don’t want to return to a scene of how things were left just after sound check. In that case I work “the analog way”. I make sure everything is on the surface in one single scene, even if that means some faders are muted and unused. The one downside of this is that guitar amps may get turned up or down by different bands, which can mean you’ll have to do gain adjustments which will have some impact, see below, on monitors. And said monitors may also require different mixes between bands.
In a small venue, I tend to try to start sound-check with vocals and keep vocal mics open during soundcheck. Since in small venues everything is so close together, vocal mics will pick up everything else on stage, from guitars to cymbals. Other instruments can be setting off feedback through a vocal mics. There often also is plenty of reverb on the drums just from what is picked up by the vocal mics.
As mentioned, getting the vocals above the band racket is usually the biggest issue in small venues. Your gig volume is determined by the loudest instrument on stage, which usually is the drums.
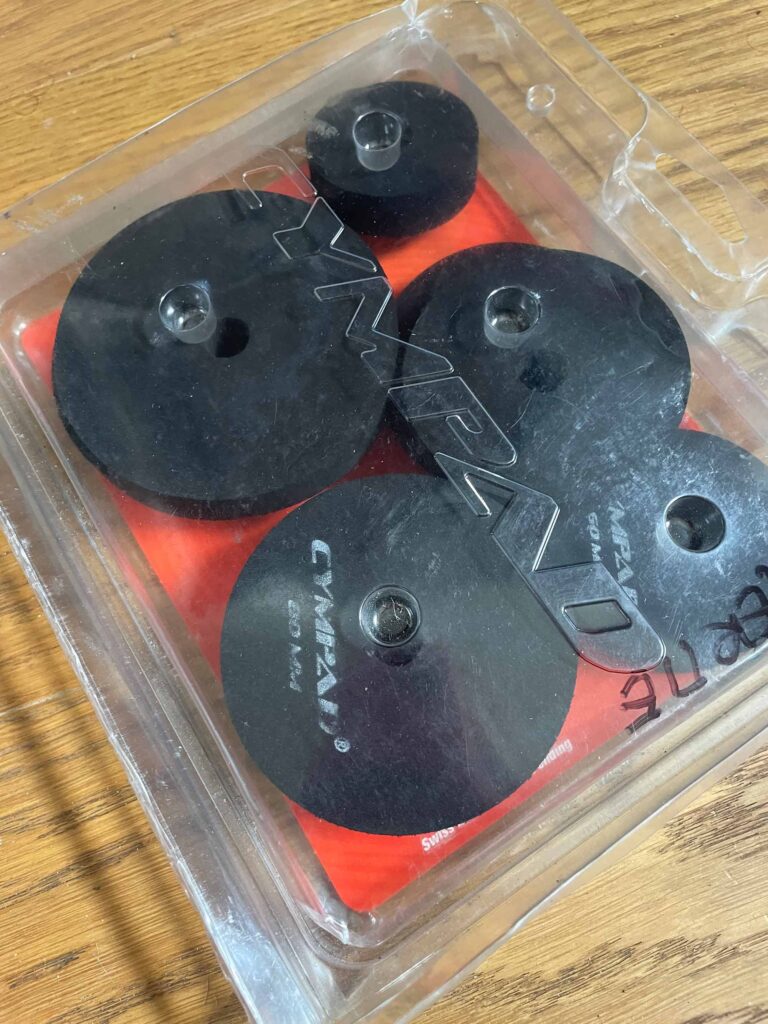
Or, well, guitars. But guitars can be turned down – although that sometimes involves extended negotiation…. or threats. Regarding this, however, there is a good trick which is to point their cabinet right at the guitarist and raise it from the floor. Also send the guitars to monitors so that they can keep amp levels a bit lower. But with drums you can’t really do that. I say not “really” because I have a trick up my sleeve and it is called… Cympads. Now, these little things have saved more small venue gigs than I can think of. And sometimes even larger ones. I can’t think of enough occasions where there would have been no chance whatsoever for anyone to hear even a hint of the vocals if it wasn’t for….Cympads. These magic things are little “felts” that are made out of rubber instead of felt and they dampen and shorten the ring of cymbals so that drummers can bash away to their heart’s desire and ….magic happens … you can still hear vocals.
In a small venue you will also invariably be doing monitors from FOH. Here the trick is clear communication and watching your gain levels. I often tell performers how I’d like them to tell me what they want once they’ve started playing. Typically, that would be: “point at what you want, and then show me whether you want it up or down”. It is also a good idea to give them a bit of monitors of what you think they’ll need before you ask each musician what they want. At the minimum, for vocalists, it will be some of themselves. Guitars often want to hear other guitars and the bassist and drummer often like to be able to hear each other. When you do monitors from front of house one important aspect to remember is that everything you’ll do to your gains will affect what is being sent to individual monitors as well. One trick that some do is to copy some channels and make them dedicated monitor channels, with their own settings. Which is sometimes good, sometimes not. What you need to remember is that every time you put your gain up, volume will go up in the monitor too, and when you put your gain down, the opposite will happen. With that in mind, one thing I insist on is for keyboard players – or anything electronic – to have their master volume at least ¾ if not all the way up. I’ve had the unpleasant experience of finding out what happens if some keyboard has their master volume setting inadvertently changed from very low to very high between sound check and gig. Unfortunately, on that particular occasion the keyboard player was also the lead vocalist and not someone buried in the mix, and ….well….essentially the whole gig was about them. And chaos ensued. Trying to figure out on the fly how to compensate for the difference to the original gain setting so that it fits both your FOH mix again and what you were sending to mons while the whole band gesticulates at you and 300 heads look the wrong way… is not a good feeling. Tell keyboards to have their master volume up at least three quarters!
And finally, don’t forget that a full room will sound very different to the empty room you do your sound check in. This has good aspects to it as feedback can be a lot more forgiving. On the other hand, some stuff may sound really different. As your gig starts, walk around a bit to get an idea of how it sounds in other places and …..enjoy your gig. You’re the pilot and your journey into sound is slowly taking off!
In part 3 we will talk about what’s in my bag, and all the little titbits that will keep things running smoothly, get you out of trouble, and make you the hero of the day, from Torx screwdrivers to drum keys via slow blow fuses…